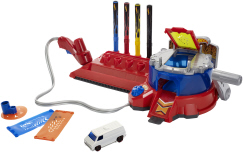
Hot Wheels® Airbrush Auto Designer
Product Desciption:
• Create and customize cars like never before!
• Kids make all the creative deco decisions
• Comes with mess-free airbrush pens
• Designs wash off easily for reuse and limitless options
Instruction Sheets
Click on a link below to view the Adobe PDF Format Instruction Sheet. To ensure proper operation, please download ALL instruction sheets for your product.
Frequently Asked Questions
-
How do I get good paint coverage with the Hot Wheels® Airbrush Auto Designer?
To cover existing paint or color you will need to apply multiple coats. First paint a thin, light coat and let it dry. Then repeat the process until you get the paint coverage you want.
-
How do I know the Hot Wheels® Airbrush Auto Designer pen is inserted correctly?
You should hear/feel it click when you push the pen down into its slot on the spray gun.
-
How do I adjust the Hot Wheels® Airbrush Auto Designer spray nozzle to reduce splatter?
You need to fine tune the spray nozzle by turning the adjustment nozzle all the way to the negative side (-). Then while holding the trigger down, slowly adjust the nozzle toward the positive side (+) until you get a nice even spray. You should also make sure that the pen is fully inserted by pushing it all the way into the slot on the spray gun until you hear/feel it click.
-
What can I do if I’m not getting any spray from the Hot Wheels® Airbrush Auto Designer nozzle?
Make sure the pen is fully inserted by pushing it all the way into the slot on the spray gun until you hear/feel it click. Start spraying with the nozzle adjuster pointed all the way toward the negative side (-) and, while holding the trigger down, slowly move the adjuster toward the positive side (+) until you get a nice even spray. If you’re still having issues, please refer to the troubleshooting section below.
-
Why am I getting foam and no spray from the Hot Wheels® Airbrush Auto Designer nozzle?
You need to fine tune the spray nozzle by turning the adjustment nozzle all the way to the negative side (-). Then while holding the trigger down, slowly adjust the nozzle toward the positive side (+) until you get a nice even spray. You should also make sure that the pen is fully inserted by pushing it all the way into the slot on the spray gun until you hear/feel it click.
-
How do I clean off my Hot Wheels® Airbrush Auto Designer car to paint again?
To clean the ink off of your car, rub it with a damp cloth and start again!
-
How can I get more colors for the Hot Wheels® Airbrush Auto Designer?
You can combine your pens to get more color combinations. For example, you can get green by applying blue and yellow inks over each other. First apply a thin layer of one color until you get the desired coverage, then switch pens and apply an even layer of your second ink. Try making your own combinations!
-
How do I use the Hot Wheels® Airbrush Auto Designer stencils?
First insert the flexible stencils into the frame with the built-in peg fitting. Connect the frame onto the four posts on top of the car decoration turntable, and then adjust the height of the frame for tall and low cars by using the two detent locations. Remember that in order to spray using stencil, the airbrush must face directly down over the top of the car and spray through the stencil.
-
How do I use the Hot Wheels® Airbrush Auto Designer circular detail stencil?
Use the circular stencil tool to add detail to your artwork. First fully insert the pen until you hear/feel it click and adjust the spray nozzle until you get a nice even spray. Then plug the circular stencil tool directly onto the end of the airbrush tip. Rotate the stencil to select the artwork that you would like to apply. The art should be centered over the spray tip and applied to the car in close range.
-
How do I dry my Hot Wheels® Airbrush Auto Designer car?
After you’ve airbrushed your car, lower the turntable into the drying chamber by turning the handle on the far right counterclockwise toward the ground. Rotate the knob outside the chamber all the way to the rightmost setting to turn the fan on. Air will blow inside the drying chamber and dry off your car!
-
How do I remove my Hot Wheels® Airbrush Auto Designer car from the drying chamber?
Push the handle on the far right counterclockwise all the way to the ground and the car platform will tip forward, allowing your car to roll out.
-
What are the best kind of batteries to use in Fisher-Price® and Mattel® products?
A. We recommend using alkaline batteries with our products, as they are great for long-term use and help optimize performance. We don't recommend using Carbon-Zinc batteries. While Carbon-Zinc batteries may work well with low-power devices, they can drain after a short period of time and cause certain products to not function properly.
-
How do you assemble the rubber band in the Hot Wheels rubber band launchers?
On the underside of the launcher, each end of the rubber band should be wrapped around a peg on each side of the main launcher and then doubled up and hooked around the center tab of the moveable portion of the launcher.
Here is a picture of an assembled rubber band launcher!
Purchase Parts
Sorry, replacement parts are not currently available for this product


