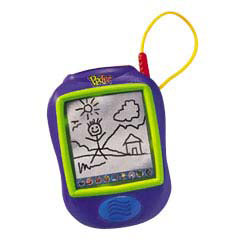
Pixter™
Product Desciption:
Kids can draw pictures, change ‘em around, add special effects and digital stamps, erase a lot or erase a little, create funny faces, connect-the-dots, even save their favorite creations…all with fun sound effects and music.
The Pixter system is expandable too; plug-in Pixter™ software to add even more creative activities and games! (Software available in a variety of titles, each sold separately.) Requires 4 "AA" alkaline batteries, (not included).
Instruction Sheets
Click on a link below to view the Adobe PDF Format Instruction Sheet. To ensure proper operation, please download ALL instruction sheets for your product.
Frequently Asked Questions
- Will basic and deluxe software work with Color Pixter? Yes, however images appear in black and white.
- Will color software work on Pixter, Pixter Plus and Pixter 2.0? No, color software is compatible with Color Pixter, only. You will need to insert the Cartridge Adaptor, which comes with the Color Pixter, into the Software Port of the product. Then, fit the black and white software cartridge (sold separately) into the adaptor.
- Can my child use headphones with Pixter? Headphones cannot be used with all Pixters. Only the Color Pixter comes equipped with a headphone jack, however, headphones are not included.
- How long should the batteries last in my Pixter? You can expect to get approximately 80 hours of battery use with the Pixter.
-
How do I calibrate my Color Pixter unit?
Please be sure you have calibrated the stylus to the screen before you use your Pixter Creativity Computer for the first time. Calibration may need to be repeated periodically. The following will help you to determine if calibration is necessary:
- When you draw on the screen, the tip of the stylus doesn’t line up with where you’re drawing.
- When you touch a button or arrow, nothing happens.
- When you select a stamper, the stamper next to the one you wanted appears on the screen.
- When you select a tool, you get the tool next to the one selected.
Here’s how you fix it:
- Turn the power on. Wait until you see the "Home" screen.
- Find the small hole in the back of your Pixter unit above the battery compartment door. That’s the calibration hole.
- Insert, push and hold the stylus in the calibration hole. Turn Pixter over so that you can see the screen. When you see two plus signs, remove the stylus from the calibration hole.
- First touch the plus sign in the upper left corner with the tip of the stylus.
- Then touch the plus sign in the lower right corner with the tip of the stylus.
-
What are the best kind of batteries to use in Fisher-Price® and Mattel® products?
A. We recommend using alkaline batteries with our products, as they are great for long-term use and help optimize performance. We don't recommend using Carbon-Zinc batteries. While Carbon-Zinc batteries may work well with low-power devices, they can drain after a short period of time and cause certain products to not function properly.
Purchase Parts
Sorry, replacement parts are not currently available for this product


